I'm always looking for ways to make our morning routine go smoother, and breakfast seems to be the thing we never have time for. Soooo...drive-thru it is!
I LOVE McDonald's Egg McMuffins, but I also know that they aren't the healthiest thing we could be eating for breakfast (or the cheapest). So what to do when you want something quick and easy and inexpensive for breakfast? You make them at home! It's so easy...you cook the egg right in the microwave!
I first tried this recipe out on a Sunday morning. Rick called me at work the next day (on my cell) three times until I finally called him back. I asked him what was wrong. He said "How did you make that egg in the microwave?" Yup, that's why he called THREE times in FIVE minutes. I gave him the instructions, and could hear my boss laughing in the background. I told Rick my boss thought it was funny, so ten minutes later I got a text from him saying "I'm texting so your boss can't hear...but that was so cool!"
Try it for yourself.
Breakfast Sandwich
One whole wheat english muffin, toasted
One slice of cheese
One egg
Spray a coffee mug with cooking spray. Crack the egg in a coffee mug and scramble with a fork. Cover with a wet paper towel and microwave for about 40 seconds. Place the cheese slice on one side of the english muffin, top with the egg, and the other muffin half and enjoy! You could also add Canadian bacon, a sausage patty, or bacon...although those don't exactly make it "healthier."
Showing posts with label The Man. Show all posts
Showing posts with label The Man. Show all posts
Thursday, January 27, 2011
Monday, December 13, 2010
Recently Heard At Our House...
I went to the salon the other day, just like I do every six weeks (I know, I know; but seriously, one of the very few things I do to treat myself) for my regular color and cut (wait, I don't color my hair. really, I don't).
Anyway, the woman before me was going to a fancy Christmas party and wanted a cute hairdo so my stylist, Linda, curled her hair in these big beautiful ringlets. It looked gorgeous and I was envious since I've always wanted curls in my straight as a board super fine hair.
Then later, when Linda was blow drying my hair, I said "think you could curl my hair like you did so-and-so's?" She said "Of course!"
So she did. After I saw it, I was wishing I had talked Rick into a date night that night, since all I was going to be doing was going home. What a shame!
When I walked through the door, the boys were on the couch. Cooper was excited that I was home, but when he jumped up to greet me, he stopped and started to laugh. Not just a little giggle, but big 'ol belly laughs.
"Mommy, you look funny!"
Way to pop that bubble, Coop.
Rick just kind of looked at me and said, "I've never seen you with curly hair before." I gave him the "stupid" look.
Two hours later we were sitting on the couch watching a movie, and Rick turns to me and says, "You know, it's kind of growing on me." I said, "The curly hair?" He said, "Yes, I just thought you should know."
Men.
Well, I LOVED the curls, so I managed to get a couple of Christmas pics in. What do you think?
Merry Christmas everyone!!
Monday, September 20, 2010
Cooper's Carnival Birthday Party!!
The weekend of Cooper's birthday passed as quickly as it came.
For his actual birthday, we celebrated with dinner at Goofy's Kitchen at the Disneyland Hotel. If you haven't been to a Character Dining Experience at either Disney Resort, you should! It's amazing, the kids thoroughly enjoyed themselves, and, while a little on the expensive side, it's well worth it. More of our family party in my next post.
Today is all about the big CARNIVAL PARTY!
Using inspiration from Adriana at and baby makes three as my jumping point, I planned and prepared for nearly four months, and I'm happy to say that the party went off without a hitch!!
I'm extra grateful to have some wonderful photographers on hand, Rick and his son Chris, who shot all of these wonderful photos. They are amazing, and Chris definitely shares his dad's talent for photography. Enjoy the pictures! (I will include a list of resources at the end).
STEP RIGHT UP, COME ON IN...
The tables were covered with yellow tablecloths and topped with white butcher paper. Centerpieces were just some simple greens in a vase tied with balloons. I set out crayons for a little creative expression.
Even the grown-ups enjoyed the coloring.
I placed some bright blue pails around the treat table, filled with candy. (the tags on the lollipops say "Thank you for coming. Hope you had a sweet time!").
The Menu:
The food was a hit! We cooked the hot dogs beforehand and wrapped them in foil to keep them warm. I also made a pasta salad for the adults (I'll be sharing that recipe soon - it's my favorite go-to for potlucks). Caramel apples were sliced apples with caramel dip.
Of course no carnival is complete without fresh popped popcorn! We filled retro popcorn bags with microwaved popcorn for our guests to munch on.
I found these red cups at Target, that came with lids and straws (not the ones pictured). $2.99 for 15! They were perfect for the cute clown straws I had purchased.
For the cupcakes I borrowed this three tiered stand from a friend, who found it at a local flea market.
It was perfect for displaying Mama's Homemade Cupcakes.
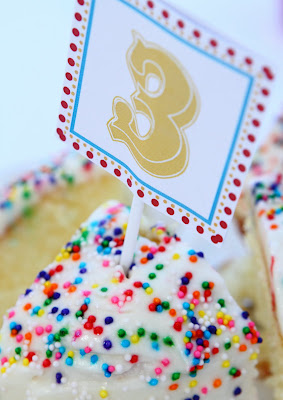
I made the cupcake toppers in Publisher. I printed them on cardstock, cut the two inch squares and attached them to coffee stir sticks with double sided tape.

For his actual birthday, we celebrated with dinner at Goofy's Kitchen at the Disneyland Hotel. If you haven't been to a Character Dining Experience at either Disney Resort, you should! It's amazing, the kids thoroughly enjoyed themselves, and, while a little on the expensive side, it's well worth it. More of our family party in my next post.
Today is all about the big CARNIVAL PARTY!
Using inspiration from Adriana at and baby makes three as my jumping point, I planned and prepared for nearly four months, and I'm happy to say that the party went off without a hitch!!
I'm extra grateful to have some wonderful photographers on hand, Rick and his son Chris, who shot all of these wonderful photos. They are amazing, and Chris definitely shares his dad's talent for photography. Enjoy the pictures! (I will include a list of resources at the end).
STEP RIGHT UP, COME ON IN...
The tables were covered with yellow tablecloths and topped with white butcher paper. Centerpieces were just some simple greens in a vase tied with balloons. I set out crayons for a little creative expression.
I placed some bright blue pails around the treat table, filled with candy. (the tags on the lollipops say "Thank you for coming. Hope you had a sweet time!").
The Menu:
The food was a hit! We cooked the hot dogs beforehand and wrapped them in foil to keep them warm. I also made a pasta salad for the adults (I'll be sharing that recipe soon - it's my favorite go-to for potlucks). Caramel apples were sliced apples with caramel dip.
Of course no carnival is complete without fresh popped popcorn! We filled retro popcorn bags with microwaved popcorn for our guests to munch on.
I found these red cups at Target, that came with lids and straws (not the ones pictured). $2.99 for 15! They were perfect for the cute clown straws I had purchased.
For the cupcakes I borrowed this three tiered stand from a friend, who found it at a local flea market.
It was perfect for displaying Mama's Homemade Cupcakes.
I made the cupcake toppers in Publisher. I printed them on cardstock, cut the two inch squares and attached them to coffee stir sticks with double sided tape.
I still wanted Cooper to have his own special cake, so I purchased a giant, plain cupcake at my local grocery store and iced it like a cake.

Cooper thought it was pretty cool.
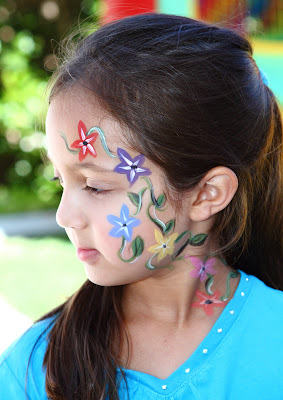
My friend Vanessa is multi-talented. Not only is she an amazing teacher and awesome Polynesian dancer, but she does some pretty fantastic face painting as well. Since she loves my Cooper too, she offered to provide face painting for his birthday party. She did an amazing job and we were so grateful!
Cooper's Snake.
We also had a jumper to help balance out some of the quieter activities!
Even some of the mommies got in on the action...in dresses no less!
Yes, that's me, getting knocked down by a seven year with way better balance!
Now, for my favorite part of the party, we also had a Photo Booth! I saw a few of these around blogland and thought, "I can do this!" But, I didn't want to spend the money for fabric for the background that I would probably never use again. Then I remembered that Grandma has a cute polka dot blanket, and voila! Instant background!
Everyone really enjoyed the photo booth, but I'll let the pictures speak for themselves!
I even kept Cooper's big birthday present to the "Carnival" theme:
Seriously, this Roller Coaster by Step2 is one of the coolest toys ever! The kids all had a great time taking turns on it.
To end the day, everyone got a party favor bag filled with carnival prizes to take home.
Cute Rice Krispie Treats courtesy of Grandma.
This party was probably the most detailed I've ever put on, and everyone had a great time! Cooper especially enjoyed himself - I don't think the smile left his face all day. I hope you enjoyed the pictures!!
Endless thank yous to Rick, my hunky partner in crime, who put up with three months of party planning and decor everywhere, my never-ending outbursts of "look how cute this!!" and who helped with everything from pick-up to set-up to clean-up. Thank you from the bottom of my heart to Chris for the amazing photography and willingness to take on any job that was needed of him (from bagging popcorn to decorating cupcakes), to Vanessa and Jennifer for their ideas and for being my cheerleaders, Kathryn for loaning us the cupcake stand, and Grandma for all of her help in making sure this party went off without hitch.
Resources:
Digital Party Pack (used for the party favor tags and Happy Birthday signs): Typewink on Etsy
Cooper's Birthday Shirt: Made Cute Just 4 U on Etsy
Framed Signs: Made in Publisher by me, using backgrounds from the digital party pack
Blue Buckets: Target (dollar aisle)
Roller Coaster: Amazon
Clown Noses: Small Toys
Party Favors/Prizes:
Clown Straws, Bird Whistles, Retro Popcorn Bags: Hey Yo Yo on Etsy
Ice Cream Shooters, Super Balls, Lollipops, Sticky Hands, Mini Pinwheels: SmallToys
Inspiration:
Adrianna @ and baby makes three
Linking to:
Labels:
Birthdays,
Crafts,
family,
Kid Friendly,
Kids,
Party Planning,
Photography,
The Boy,
The Man
Saturday, September 18, 2010
Love Like Crazy
Today my son is three years old. He is spunky, stubborn, loving, curious, loud, smart, energetic, funny and charming. I can't imagine a love bigger than the love I have for him.
Happy Birthday Cooper! Today we celebrate you, and the beautiful child you are.
"Be a best friend, tell the truth, overuse 'I Love You,' go to work, do your best, don't outsmart your common sense, never let your prayin' knees get lazy, and love like crazy!"
The following pictures are from Cooper's Three Year Photo Shoot by Rick Maxwell Photography, aka "The Man" :)
Labels:
Birthdays,
Motherhood,
Photography,
The Boy,
The Man
Friday, September 10, 2010
Hello Kitty Cupcake Toppers & Chocolate Cupcake Recipe
Rick's daughter has a birthday tomorrow, exactly one week before my boy's birthday, and just two weeks from Rick's son's birthday. Do the math, that's three birthdays in two weeks. Yikes! So, I'm trying to be as frugal as possible this year by making as much as possible.
I offered to make Gracie's birthday cupcakes, and of course the first order of business was to find a great recipe for chocolate cupcakes. I did.
Oh. Yeah. Check it out. There's also a recipe for chocolate butter frosting, but this little girl wanted Hello Kitty pink and white. Wish granted!
Hershey's Perfectly Chocolate Cupcakes
I made a buttercream icing to top them with, but it's a basic. I double the recipe and it generously frosted all 26 cupcakes.
Easy Buttercream Icing
4 cups powdered sugar
1/2 cup butter, softened
1/2 teaspoon vanilla
6 Tblsp milk
Whip the butter until fluffy. Gradually add in 1 cup of the powdered sugar and reduce speed to low, add in the liquid, salt and flavoring. Last the rest of the powdered sugar. If firmer icing is needed, add in a bit more powdered sugar, if softer icing is needed, add in a bit more of the milk. Flavor as desired.
And here's the finished product:
I also created the Hello Kitty cupcake toppers in Publisher, since buying the download alone would have cost me $6-$10 on Etsy, and buying them completed would have been upwards of $15 per dozen.
I found some free images on google search, created a 2 inch square and designed away! I printed the toppers on cardstock, cut them out out and attached two cards to a coffee stirrer with double stick tape. Simple! I thought about adding some ribbon to the sticks as well, but ran out of time.
I think she'll like them. What do you think?
Happy birthday sweet girl!
Cooper's birthday is a week away...I'll be back next week with an update on that party!
Labels:
Birthdays,
Party Planning,
The Boy,
The Man
Subscribe to:
Posts (Atom)


